

My Clamp Storage Solution

This was a shop change that I made a while ago and was not sure it would work or if I would like it, so I never made a post. But since I have been using this storage for all of my clamps for a few years, I figure I may as well show it off.
Clean Slate
The area near my workbench and under a window was not really being used and the window was high enough that my longest clamp (48 inches) would fit, so it seemed like a great spot. I attached a 1/2" plywood backer to the wall that was about 4 foot wide and 30 inches high. This was a leftover piece of plywood for me. A 3/4" thick would be better but this works just fine.

Clamp Layout
Now that I know the area to work with, I laid the clamps out in various patterns until I found the one that I liked. For me, it was best to have my quick clamps the closest to my bench (as I tend to use them the most often), and the longer cabinet clamps further away.

Hanging the Clamps
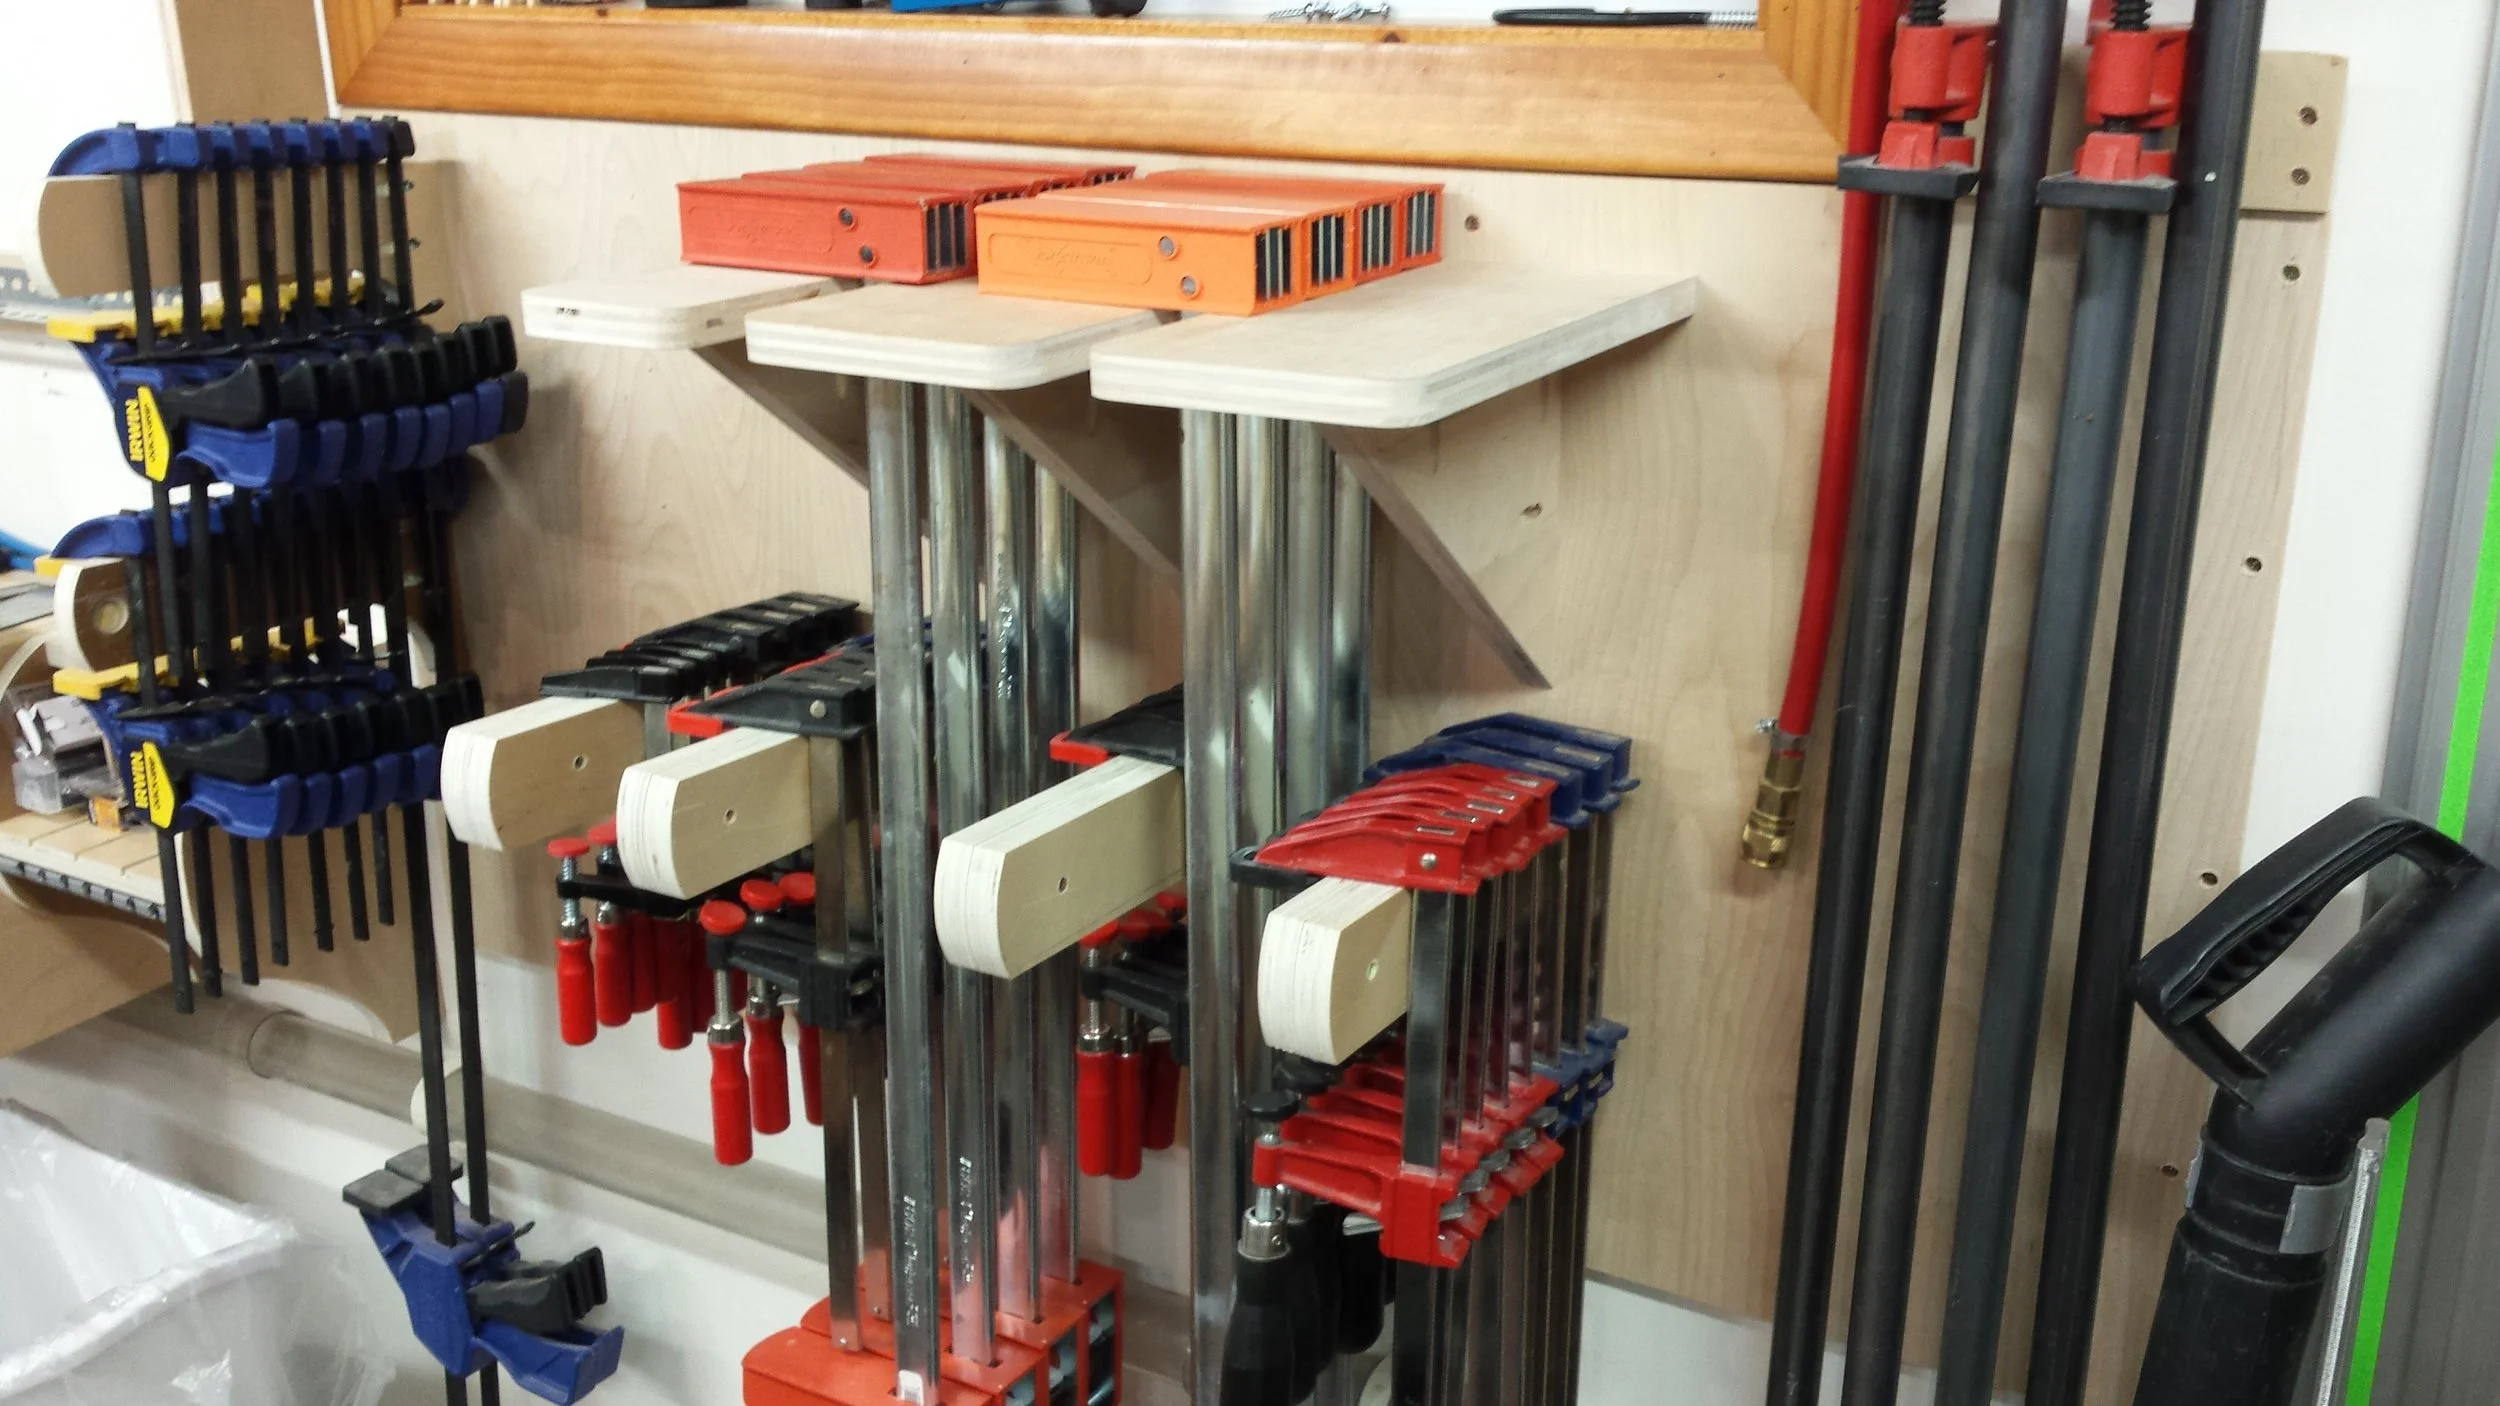
Now that I had the space defined and a layout of the clamps, it was time to figure out how to hand each of the clamps. I wanted to stack all of one type and length onto one hanger but not have them stick out from the wall and be in the way. With the space I had and the number of clamps, 12" was about right for the length of the arm. The arm is a simple piece that is about 3 inches tall in the front and curves in the back to 5 inches. Easy enough to cut on the bandsaw or with a jigsaw, then sand to smooth the plywood edges.

The quick clamps are light so they only needed a single 3/4" thick arm to support them. The F-style clamps are heavier so I doubled up 3/4" thick plywood and repeated for the remaining clamp lengths.
The arms are held to the plywood backer using pocket holes screws. I placed two screws on one side and one on the other of each arm. This may seem like it's not enough mechanical hold but I tested the method and it is able to hold way more weight than a few clamps add up to. This method also allows for some adjustability in the future, if the layout were not working out or more clamps were purchased.
More Clamps!
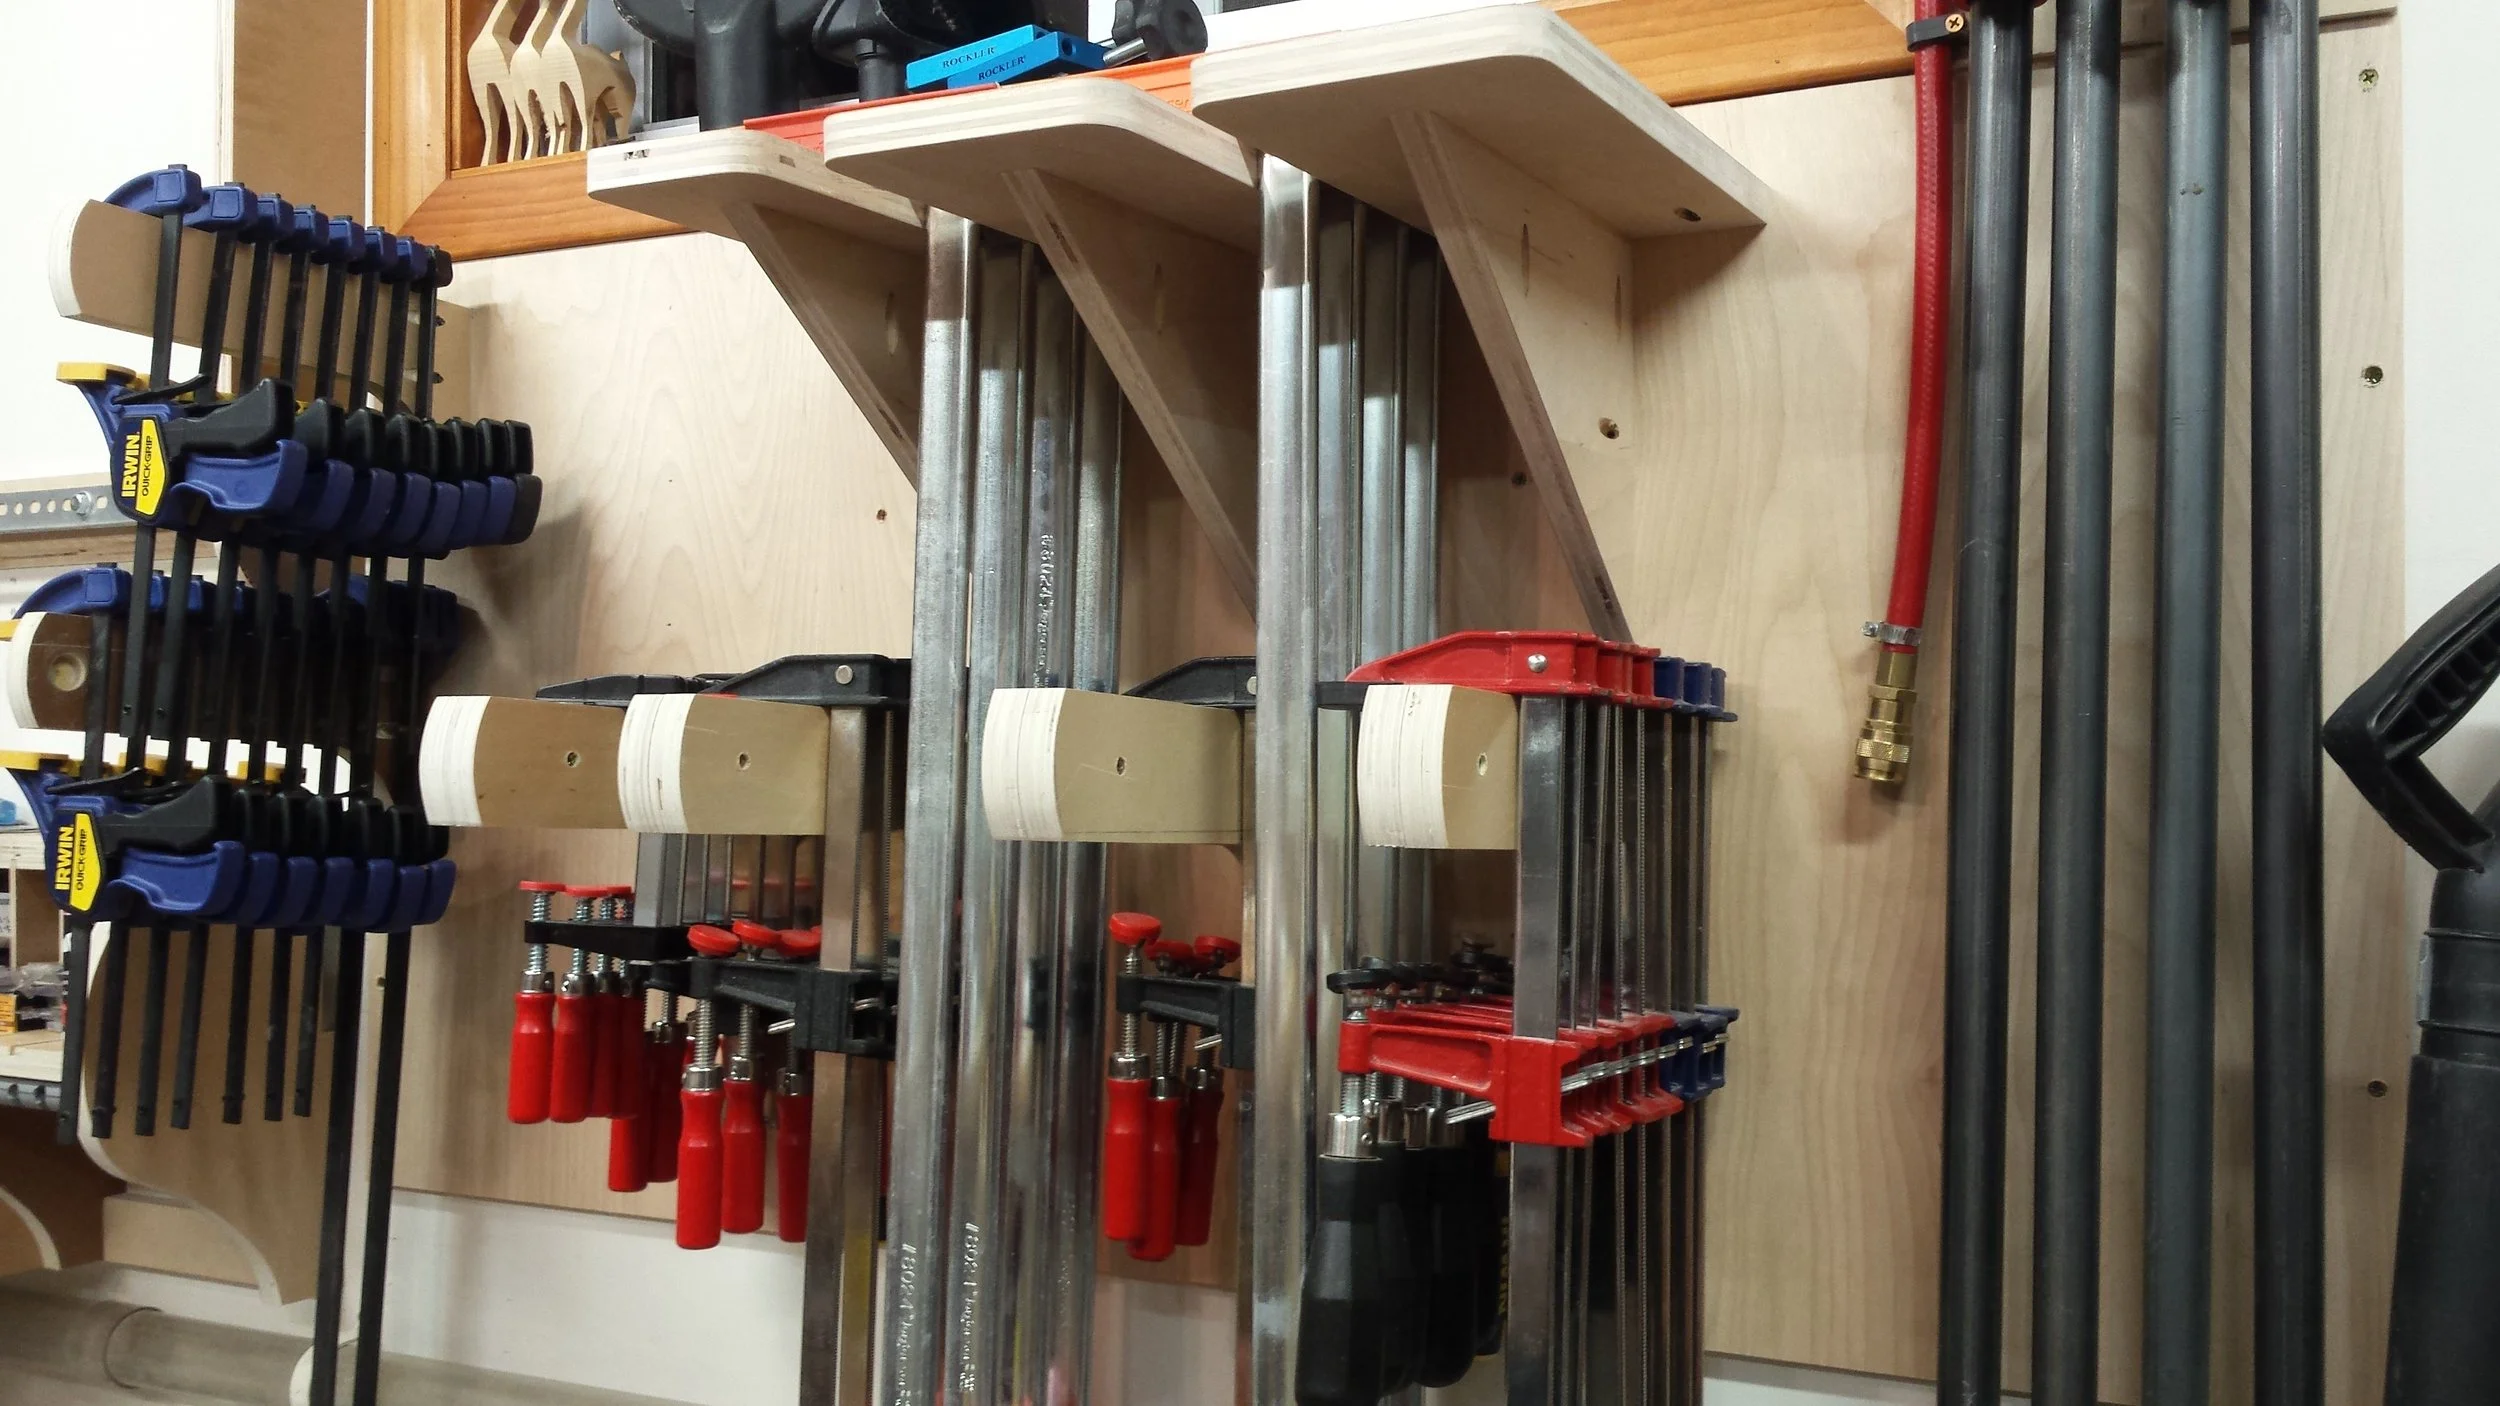
With the F-Style clamps complete, I needed a different way to hang the parallel or cabinet style clamps. These clamps are heavier and longer so they need more support, plus the clamp design required a different approach.
I decided on a simple platform with a triangle support piece. The platform width was determined by the size of the clamp jaw, plus an inch. Each clamp would sit on two of the platforms or each side of the clamp rail. To hang the platforms, I used pocket hole screws again. This time I added two to the platform, in addition to the three in the support.


Even more clamps! (a woodworker can never have enough)
One clamp style I had not really addressed was the spring clamps but as the cabinet clamp arms were being loaded, it seemed a simple solution to attach the spring clamps to the supports. Easy and still allow the cabinet clamps to be removed for use without interference.
The pipe clamps were not even on my radar when I laid out the clamps but the solution for them was simple too. My pipe clamps have feet to hold them steady on a bench. These feet work great for hanging on a french cleat style, 45-degree block attached to the backer panel. Simple solution.


Wrapping Up
This was a simple project but one that really needed to be done. Previous to this, my clamps were in a couple of spots in the shop and not near the area I needed to use them. Now they are close at hand and organized.
I really like how this turned out and if it helped your clamp organization in any way... Bonus!
Thanks,
Mark